Accessible PDFs with a Macintosh Computer
The Problem
Microsoft Word 2011 for the Mac cannot produce a fully accessible PDF. A PDF made from Microsoft Word 2011 for the Mac does not retain the structure tags (headings, lists, table headers, etc.) from the original document, so it is difficult for a screen reader user to navigate.
Solution Options
- Make your page an HTML web page instead of a PDF. HTML web pages are more accessible and easier to update/change than a PDF.
- Create your Word document with MS Word 2011 for the Mac. Save your document on a thumb drive (or email it to yourself). Then from a PC Microsoft Windows computer open your documents with MS Word 2010 and convert them to a PDF. Make sure to follow the instructions for creating an accessible PDF with MS Office for Windows.
- Create your word document with iWork’s Pages software, export or save it as a .doc file. Save your document on a thumb drive (or email it to yourself). Then from a PC Microsoft Windows computer open your documents with MS Word 2010 and convert them to a PDF. Make sure to follow the instructions for creating an accessible PDF with MS Office for Windows.
- Get Parallels (or VMware), Windows and MS Office for Windows installed on your Macintosh. Parallels (or VMware) essentially let you run a PC on your Macintosh. Then just follow the instructions for creating an accessible PDF with MS Office for Windows.
- Download LibreOffice which is a free, open-source office suite similar to MS Office. LibreOffice is probably being used by some of your students because it’s free! It can open MS Word documents and can save documents as MS Word documents. And it can create accessible PDFs! See below for more information on using LibreOffice.
Creating an Accessible PDF with LibreOffice
You can either create your documents with LibreOffice or open an MS Word document in Libre and export it as a PDF (See step 5 to just save as a PDF.) When you open your Word document in Libre, you may have to fix of the formatting. In my experience I’ve just had to fix the bullets of lists. No biggie.
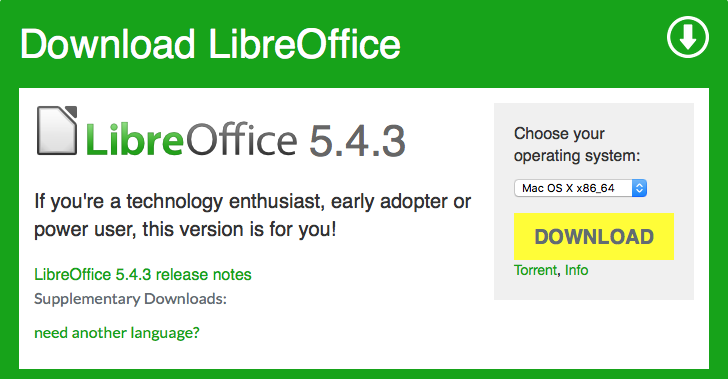
- Download LibreOffice (Click on “Main Installer”)

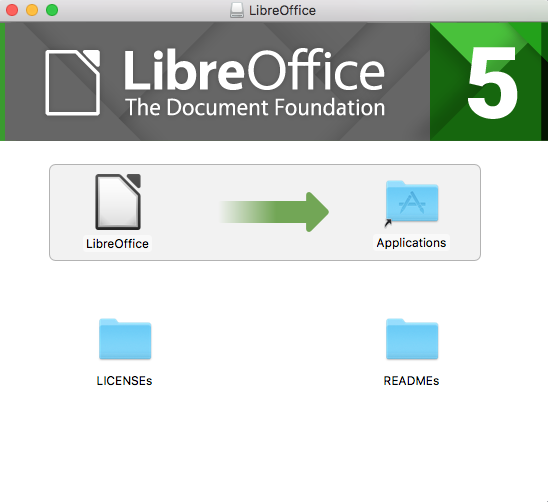
- Open with “DiskImageMounter (default)”
- Drag LibreOffice to Applications folder

Using LibreOffice to Make an Accessible PDF
- Open LibreOffice
- Create a Text Document
- Apply headings, and if you have lists, use the built-in list icon to create them.

- To add images, choose Picture from the Insert Menu.
- To add alt text to the picture, right click on it and select “Description”. Enter alt text in both title and again in description fields to cover the different Assistive Technologies that use one or the other.
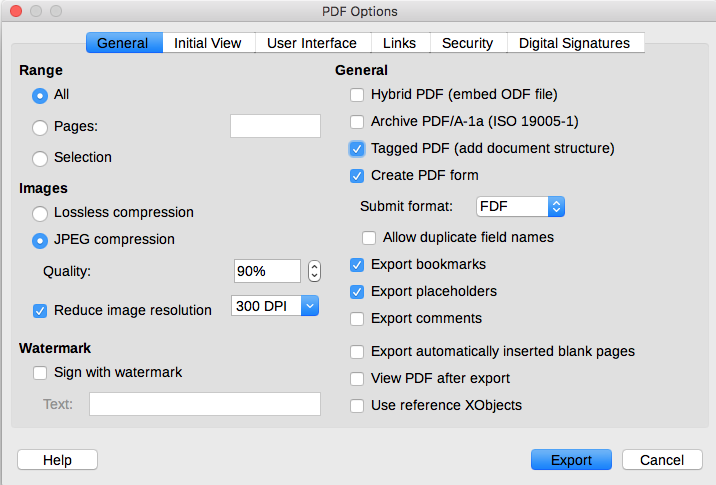
- To save as an accessible PDF, choose “Export as PDF” from the File menu.
- Make sure to check: “Tagged PDF” and “Export bookmarks”

- And Ta Daa! You’ve got an accessible PDF! See a video of a screen reader reading the accessible PDF I made with LibreOffice.
