About widgets
Widgets are sections of content that provide information and links to tools, courses, and personal settings that can be added to your course homepage. You can create a custom widget that contains links to files or websites for your students. You can add custom HTML code to create a wide range of widgets. As an Instructor, you can create custom widgets for your courses. Two examples of custom widgets are the Student Help Desk widget and the Library Research Guide widget.
Note: too many widgets can actually hide important information that students need. It may be more effective to put some content in your Content area or in an announcement.
- What is required: A D2L Brightspace course
About widgets
If you feel creative, Instructors can create custom widgets from scratch that will display on the Course Homepage, to serve additional needs that the standard widgets don’t cover, such as a profile widget with your contact information. Your options for creating a custom widget:
- Ask yourself (or our support staff) if a Widget is the most effective way to present your content
- Check out this great Community article, Widget Central, that gives ideas of custom widgets you could create.
Option 1: Create a custom widgets
- View the D2L documentation: Create a custom widgets
Option 2: Add widgets to a course homepage
You will need to add the widget to the course homepage to display it
- Follow these directions to learn how to create a custom homepage & activate your course homepage
- Video tutorial on how to Create and manage a course homepage
Option 3: Edit a custom widgets
Some custom widgets may not be edited because they are maintained by Online Learning
- Click Course Admin from the course navbar
- Click Widgets
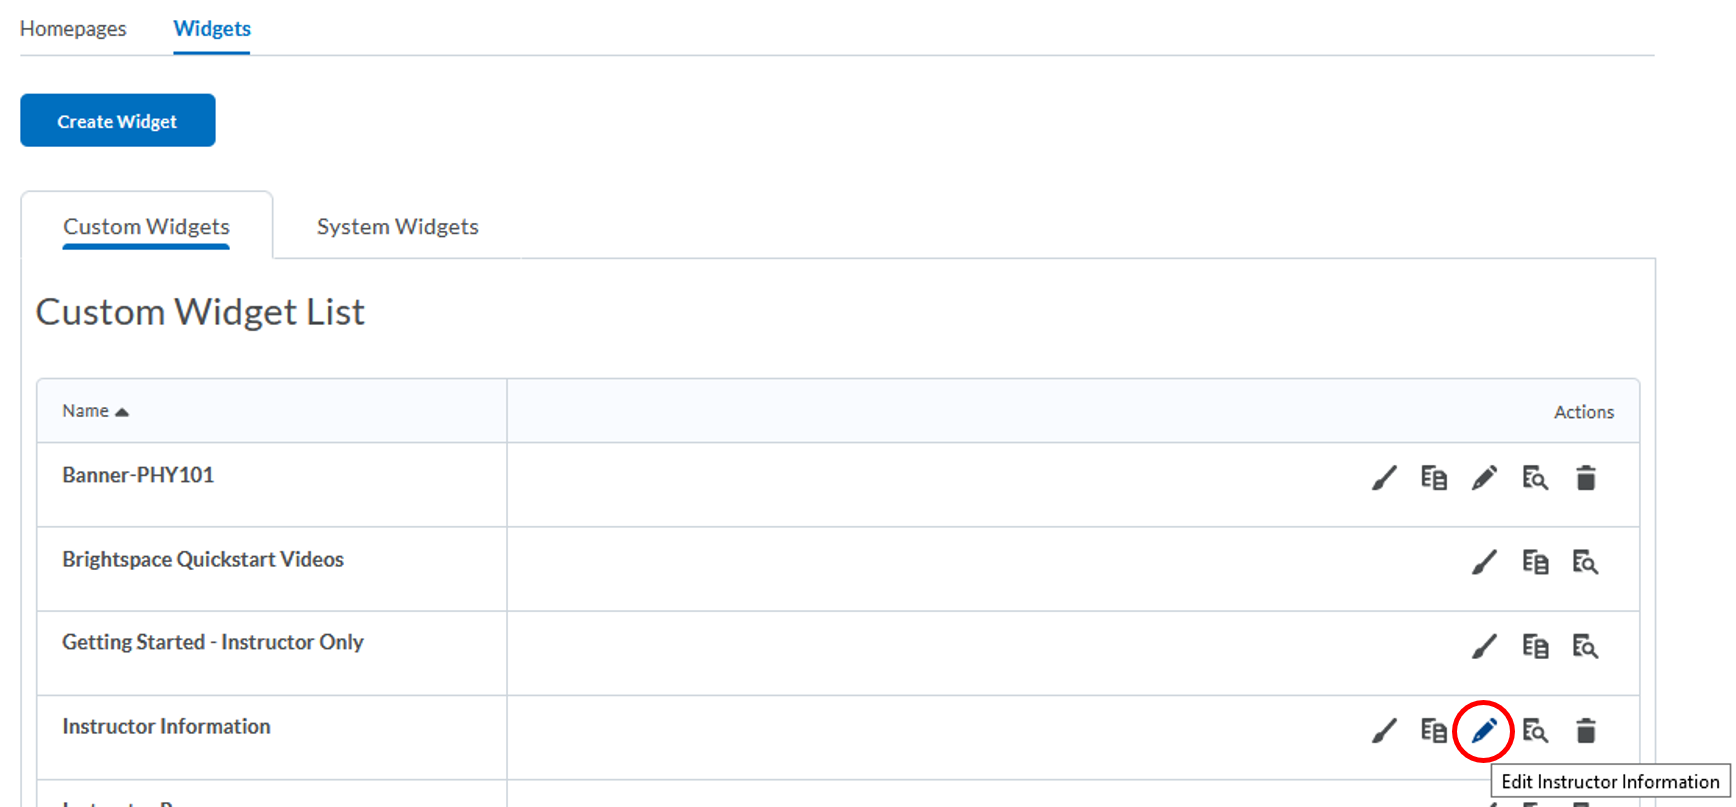
- Click on the Edit icon (pencil icon) next to the widget you want to edit

- Make changes to the widget in the Properties and Content tabs, as applicable
- Properties tab, if you need to change the widget’s name
- Content tab, if you need to change the widget content
- Click the Save and Close button
Option 3a: Widget Display Settings
Custom widgets that you created can have specific display settings that can be modified. These settings allow instructors to control how much content is displayed in the widget.
- Click Course Admin from the course navbar
- Click Widgets
- Click on the Edit icon (pencil icon) next to the widget you want to edit
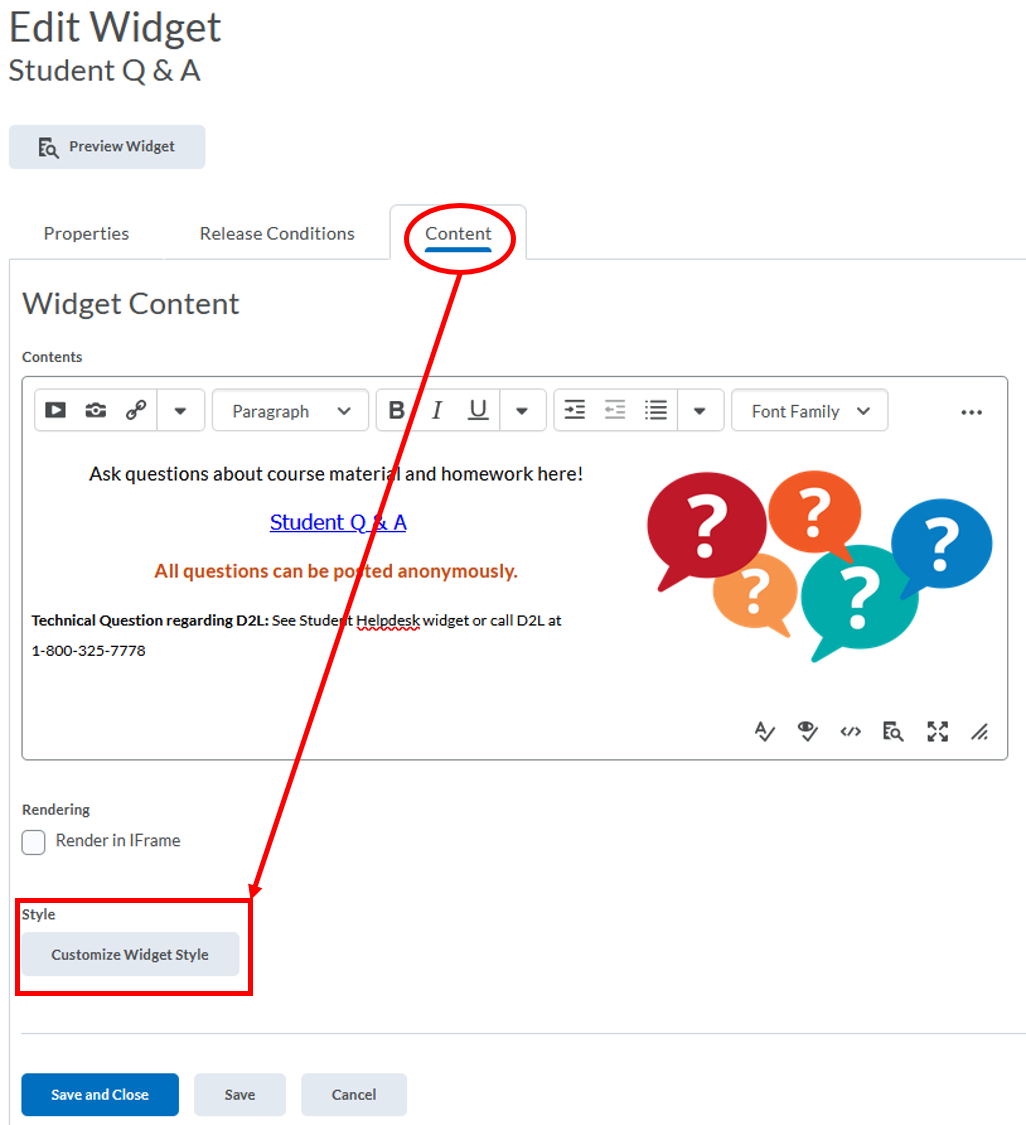
- In the Content tab, click the Customize Widget Style button

- Choose the customization:
- Display a title: check this box to display the title as set in the widget’s settings (default)
- Display widget container style: check this box to keep the widget inside the container box (default)
- Prohibit minimizing a widget: check this box to prevent student’s from hiding the widget
- Default widget name: instructors can keep the default name or set a custom name (default)
- Click the Save and Close button
Option 4: Copy a widgets
You can copy an existing widget and modify it rather than creating a widget from scratch.
- Click Course Admin from the course navbar
- Click Widgets
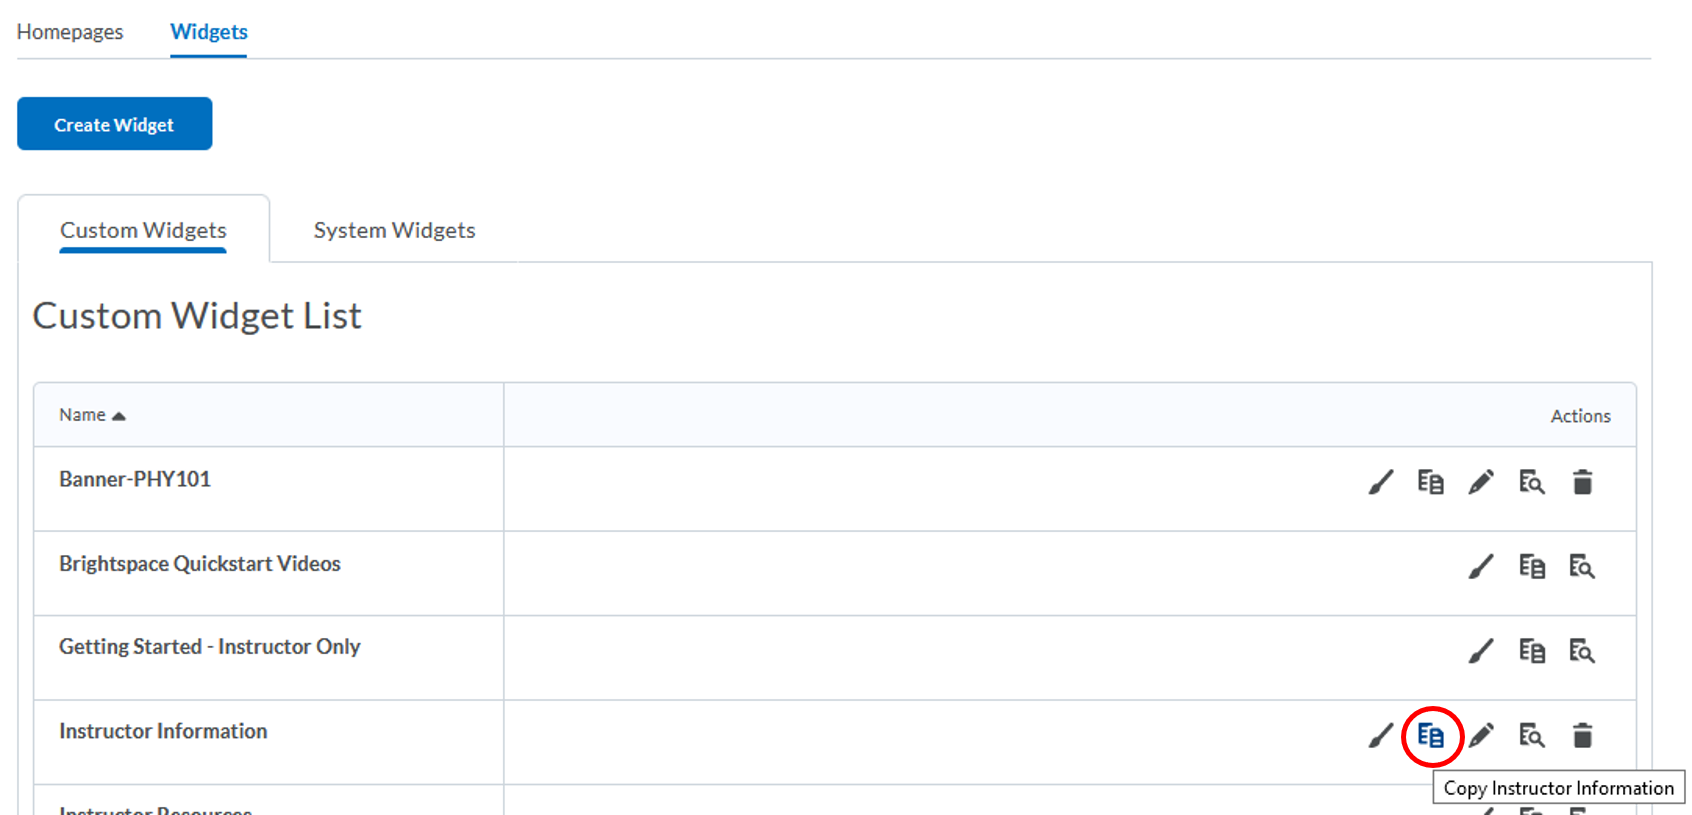
- Click on the Copy icon (2 papers icon) next to the widget you want to edit

- Follow Option 3 to learn how to Edit your new custom widgets
Option 5: Delete a custom widgets
You may not be able to delete some custom widgets. You can only delete a custom widget that you created.
- Click Course Admin from the course navbar
- Click Widgets
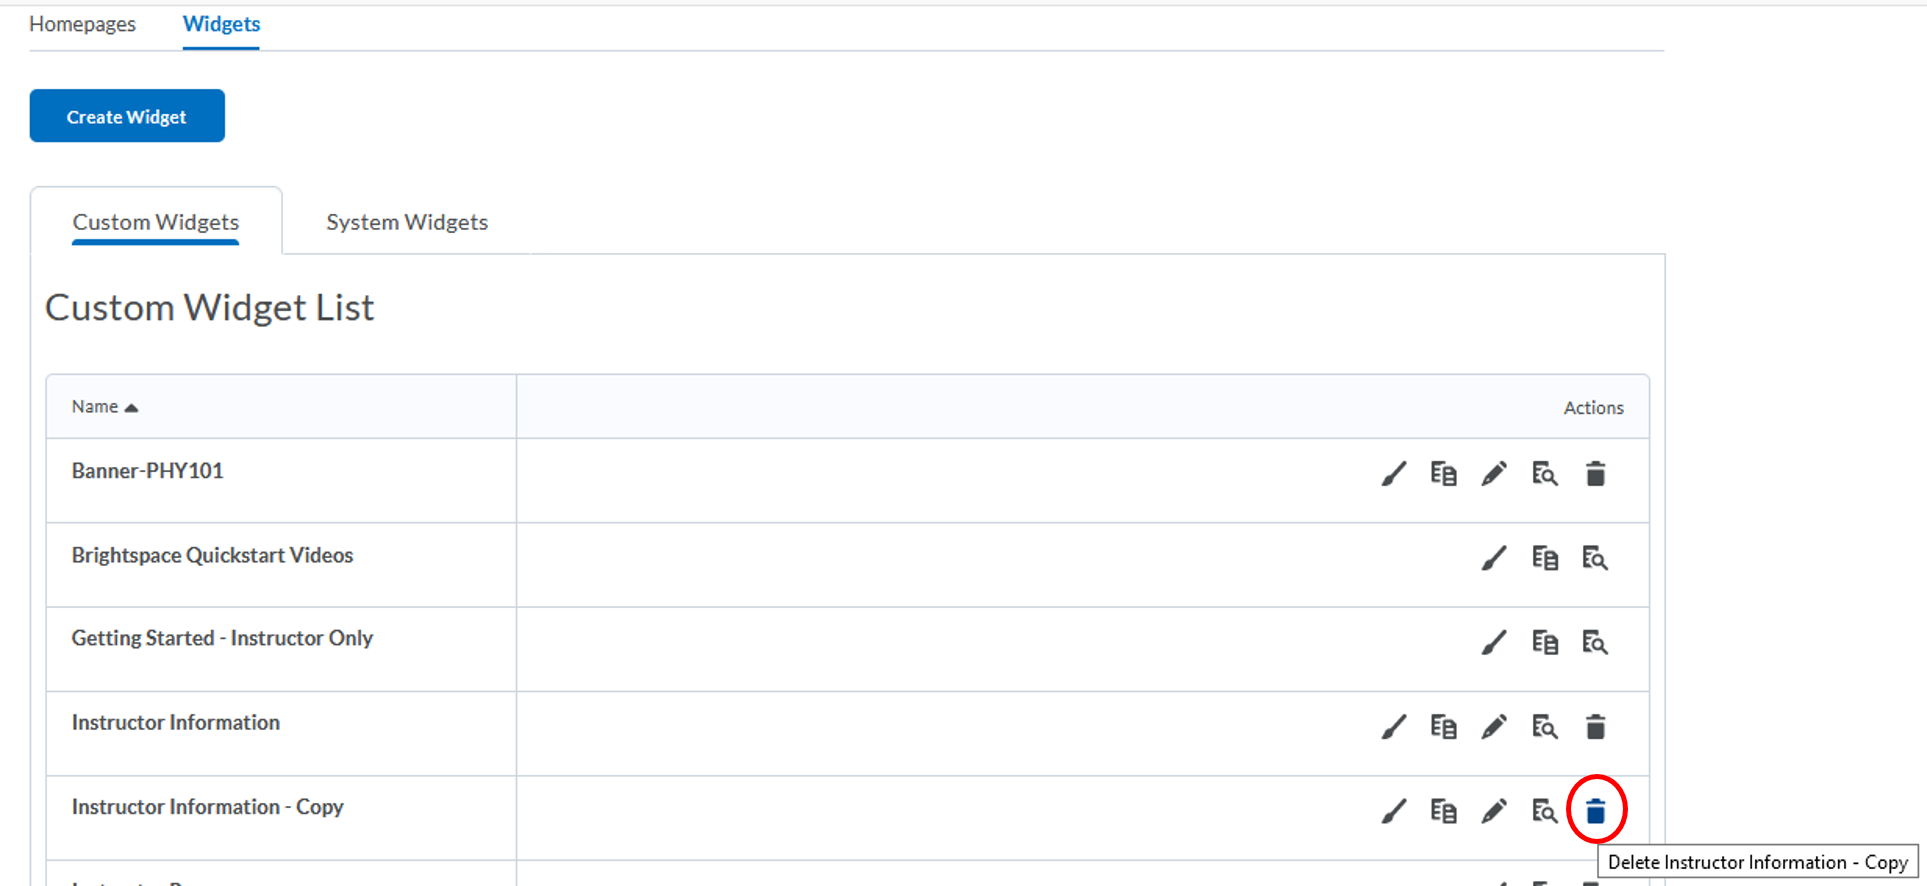
- Click on the Delete icon (trash icon) next to the widget you want to edit

- Click the Delete button on the confirmation page. You will see a message “Deleted successfully” at the bottom of the page
Widget List
System widgets
- List of system widgets: system widgets are defined by the Brightspace platform and can’t be modify or delete
Custom widgets
We have some custom widgets that are available for you to add to your course homepage listed here. Contact the Online Faculty Helpdesk if you need help adding one of the custom widgets to your course homepage.
- Student Help Desk
- Library Research Guide
- Tutoring
- Instructor Information (OL Template 8 – example)
- Student Q & A
