Manually grading a quiz question
Some quiz questions are graded automatically by Brightspace, including multiple-choice, true/false, multi-select, matching, etc. If you have a quiz question that is not automatically graded, such as Written Response question, it must be graded manually by you. This may be an intentional decision, or you may need to grade the question if it was not originally set to grade automatically.
- What is required: A Brightspace quiz with questions that are not automatically graded
Tutorials:
Manually grading a Quiz
Step 1: Accessing Grade view
- Click Quizzes from the course navbar
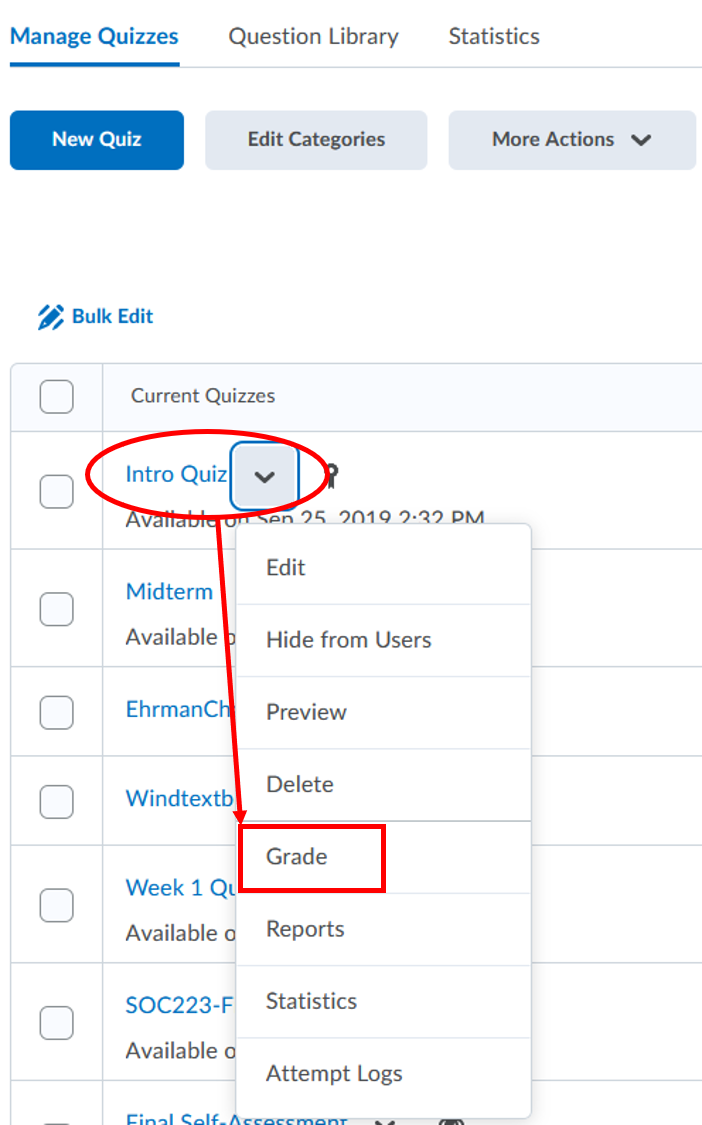
- Click the drop-down action menu next to the quiz’s name and choose Grade
- You can choose to grade by users, attempts, or question
Step 2: Grading by
Option 1: Users
This option organizes quizzes by student, so you can grade one student’s quiz at a time.
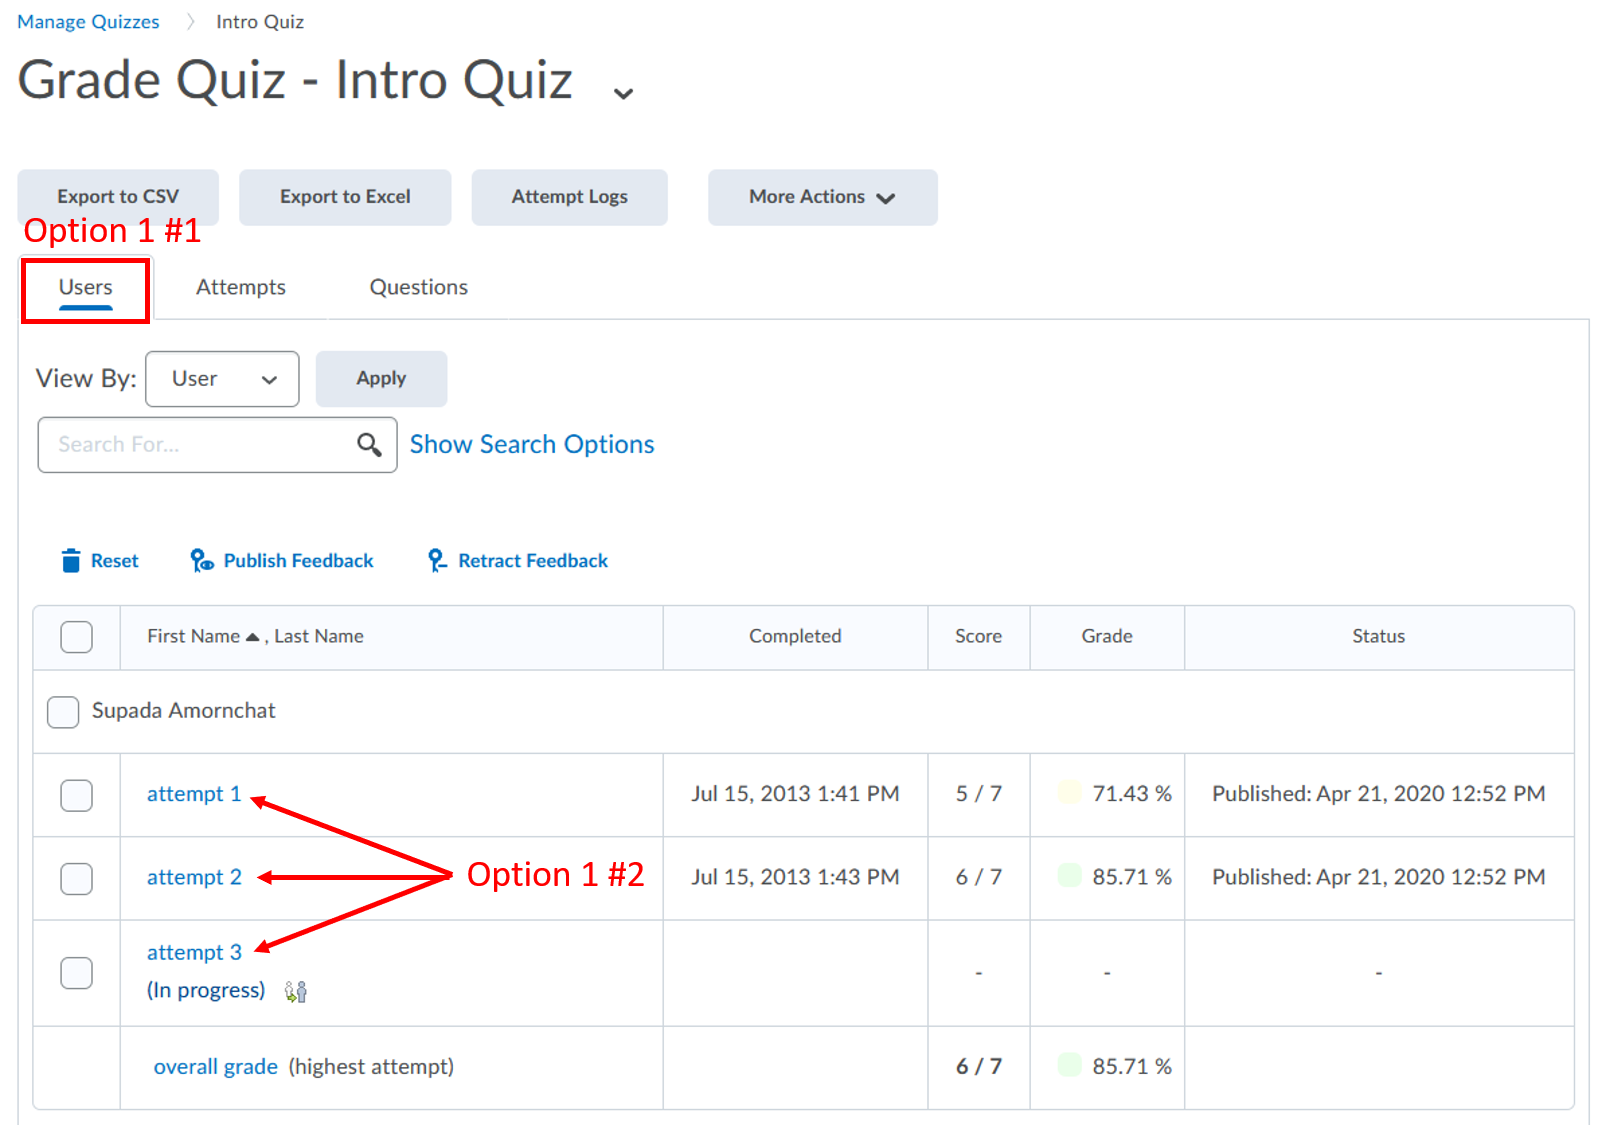
- Make sure you are on the Users tab
- Click the attempt # link below each student’s name to view their quiz attempt
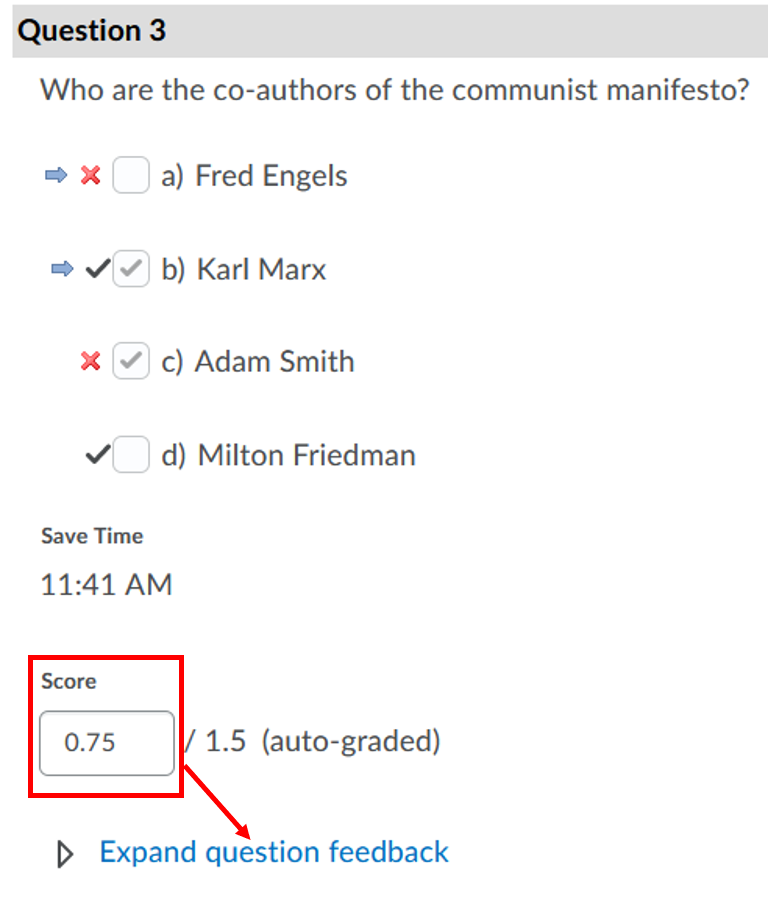
- Inside the Grade Attempt page, below each question, enter a new or replace an existing points value in the Score field
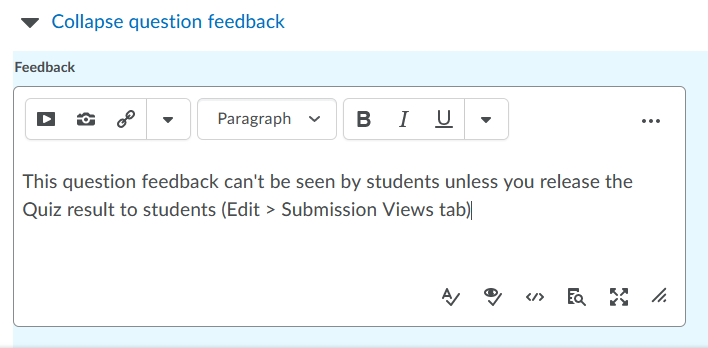
- Click Expand question feedback link to add comments or feedback for the question
- Enter your comment in the Feedback field
Note: feedback under each question is different from Attempt Feedback. Students can’t see this feedback unless you release the quiz result to students by setting the Submission Views tab.
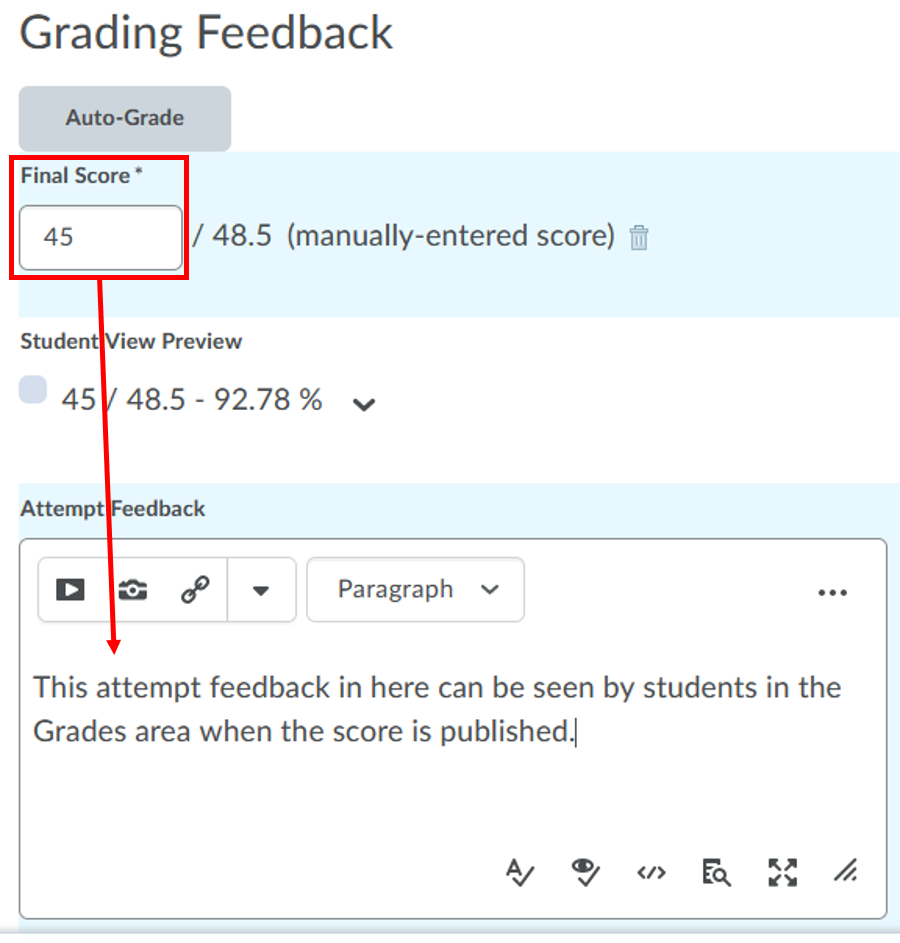
- Continue manually grading each question. Almost the top of the Grade Attempt page, under Grading Feedback, the Final score will be updated automatically when you click the Update button or you can override the final score in this area.
- You can add more comment or feedback in the Attempt Feedback field as an overall feedback of the quiz for the student
Note: feedback under each question is different from Attempt Feedback. Students can see this attempt feedback when the score is published
- Click the Update button. Click Yes to confirm your changes
- If there are more than 1 attempt per student, click the drop-down arrow for Attempt at the top of the page to switch to the next attempt. Don’t forget to click the Update button to save changes for each attempt
- Click the Previous or Next button at the top right to continue grading the next student’s attempt. You can click the Back button at the top left to take you back to Quiz grading view

Option 2: Attempts
Attempts refer to a student’s completed quiz. This view organizes by Attempts.
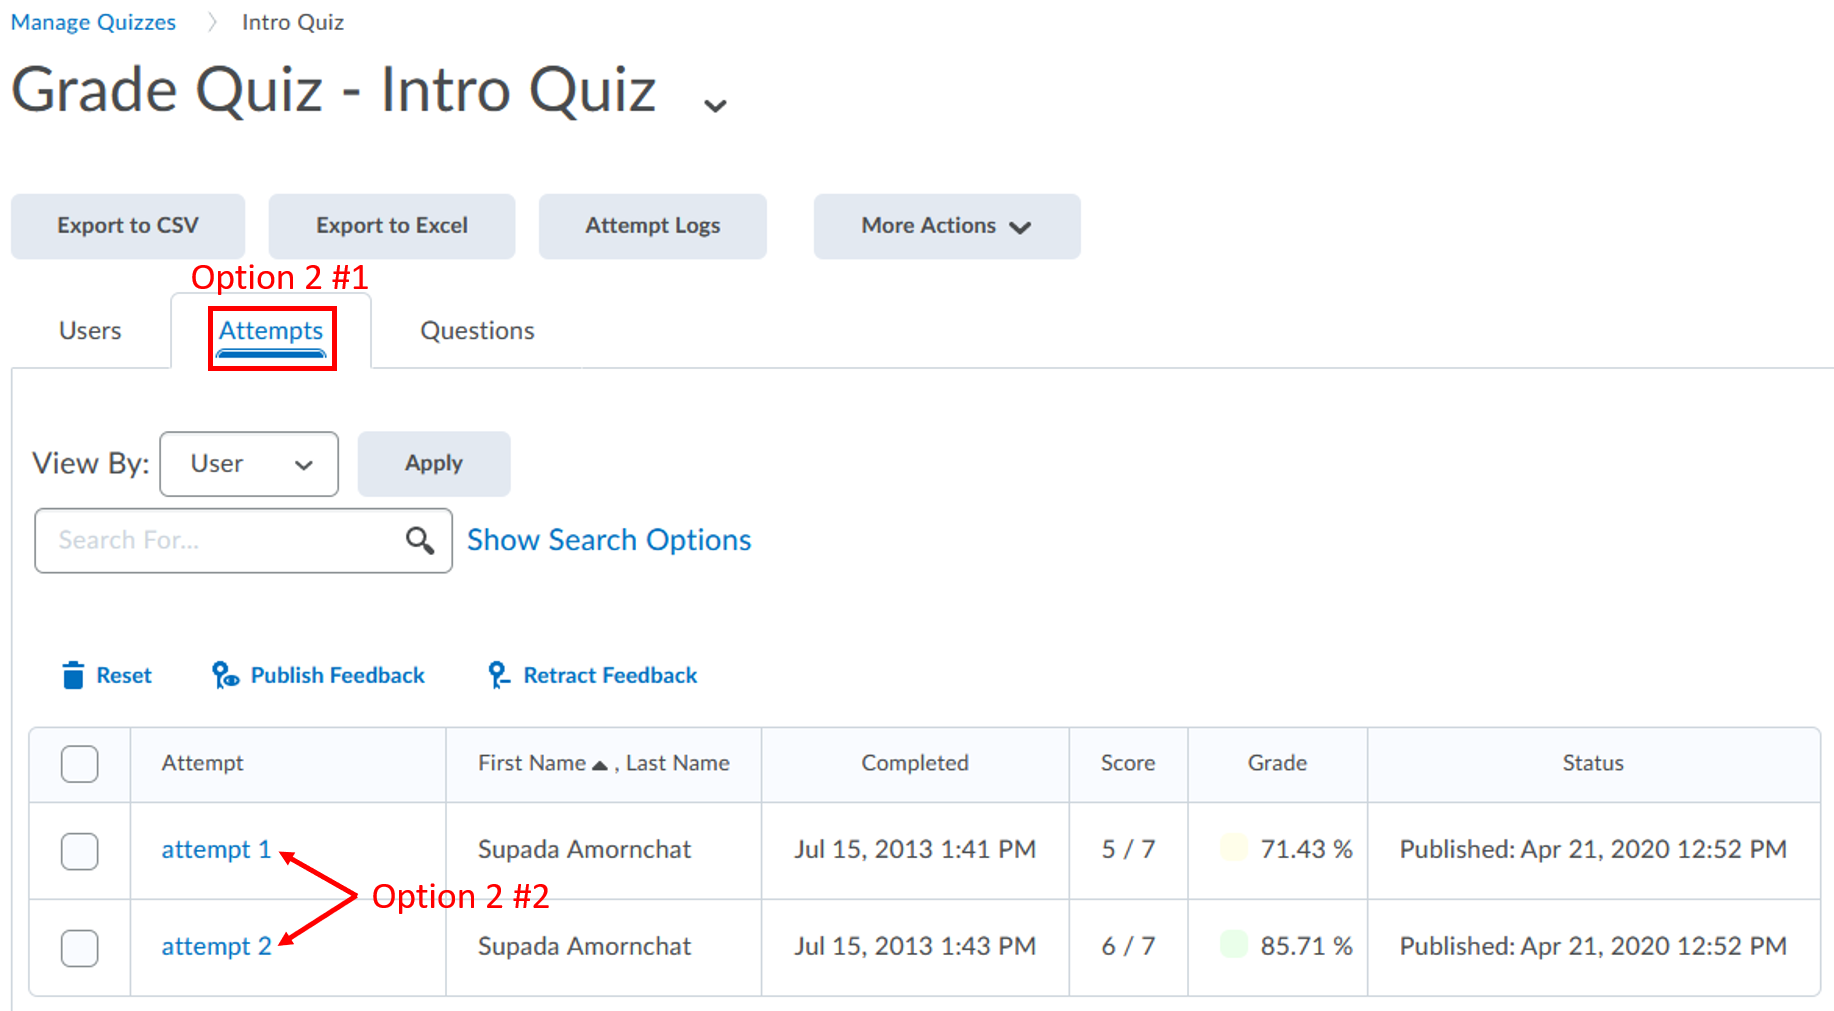
- Make sure you are on the Attempts tab
- Click the attempt # link below each student’s name to view their quiz attempt
- Inside the Grade Attempt page, below each question, enter a new or replace an existing points value in the Score field
- Click Expand question feedback link to add comments or feedback for the question

- Enter your comment in the Feedback field
Note: feedback under each question is different from Attempt Feedback. Students can’t see this feedback unless you release the quiz result to students by setting the Submission Views tab.

- Continue manually grading each question. Almost the top of the Grade Attempt page, under Grading Feedback, the Final score will be updated automatically when you click the Update button or you can override the final score in this area.
- You can add more comment or feedback in the Attempt Feedback field as an overall feedback of the quiz for the student
Note: feedback under each question is different from Attempt Feedback. Students can see this attempt feedback when the score is published

- Click the Update button. Click Yes to confirm your changes
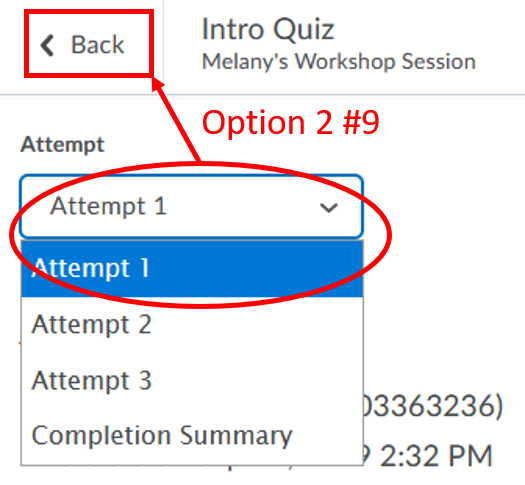
- If there are more than 1 attempt per student, click the drop-down arrow for Attempt at the top of the page to switch to the next attempt. Otherwise, click the Back button at the top left to take you back to Quiz grading view
Option 3: Questions
While grading a quiz, click the Questions tab to view quiz responses by question. Before you click on a question, there are two options available to view question responses: Grade Individual Responses and Update All Attempts.
Option 3a: Grade Individual Responses
Grade Individual Responses enables you to grade a quiz one question at a time. This means you can grade and leave feedback for all responses to each question before moving onto the next question. There are two additional options available in this view:
- Blind Marking Student information does not appear alongside responses and responses display in a shuffled order. This aids in preventing unintentional bias during grading.
- View Graded Responses Previously-graded responses appear as part of the response queue.
Option 3b: Update All Attempts
Update All Attempts enables you to view question statistics, make grading changes, and leave feedback for all responses to the selected question.
Question statistics display a percentage breakdown of how users responded to the question and the date of the most recent response. Other information that displays in the question statistics includes the quiz version, question text and options, and number of responses for each option.
Below the question statistics, there are options to modify the grade for all responses to the current question. Use Grading Type to override grades for all users at once, instead of individually updating each quiz attempt. The following options are available for the Grading Type:
- Give to all attempts: Allows you to award points to all users who received the current question on their quiz. Type the desired point value in the text field.
- Give to attempts with answer (#): Allows you to award points for a specific response. This is useful if a question was incorrectly set up when the quiz was created. For example, if students who complete the quiz receive a grade value of 0 when they really should receive a grade value of 1, you can use this option to award them the appropriate grade value.
NOTE: Any changes made to the grading of a quiz question record in the Modifications Log. The log documents the date, time, username, and action taken for each change to quiz grading.
Step 3: Check Quiz settings
Using the new quiz experience
- Click Quizzes from the course navbar
- Click the drop-down action menu next to the quiz’s name and choose Edit
- Below the quiz name, check to see if the quiz is linked to the gradebook. If it reads Not in Grade Book, you will need to link it. If you haven’t created the grade item, click add grade item. Enter the name for the grade item, enter the score in maximum points, and click Save. If you already have the grade item created, click Edit or Link to Existing. IN the popup box select link to an existing grade item, find the item in the drop-down menu to link, and click OK at the bottom of the page.
- Next, click on the Evaluation Feedback tab to the right of the quiz
- Check the box to Auto-publish attempt results immediately upon completion, for the score to go automatically to the grade book.
- Check the Synchronize to grade book on publish.
- Click on Customize Quiz Result Displays
- Follow the guide to release the quiz results to students. This will allow students to be able to see the question feedback that you add below each question earlier in Step 2
- Click the Save and Close button
Step 4: Publish quiz score to the Grades manually
- Click Quizzes from the course navbar
- Click the drop-down action menu next to the quiz’s name and choose Grade

- Check the box for Select all rows to select all students in the list
- Click Publish Feedback
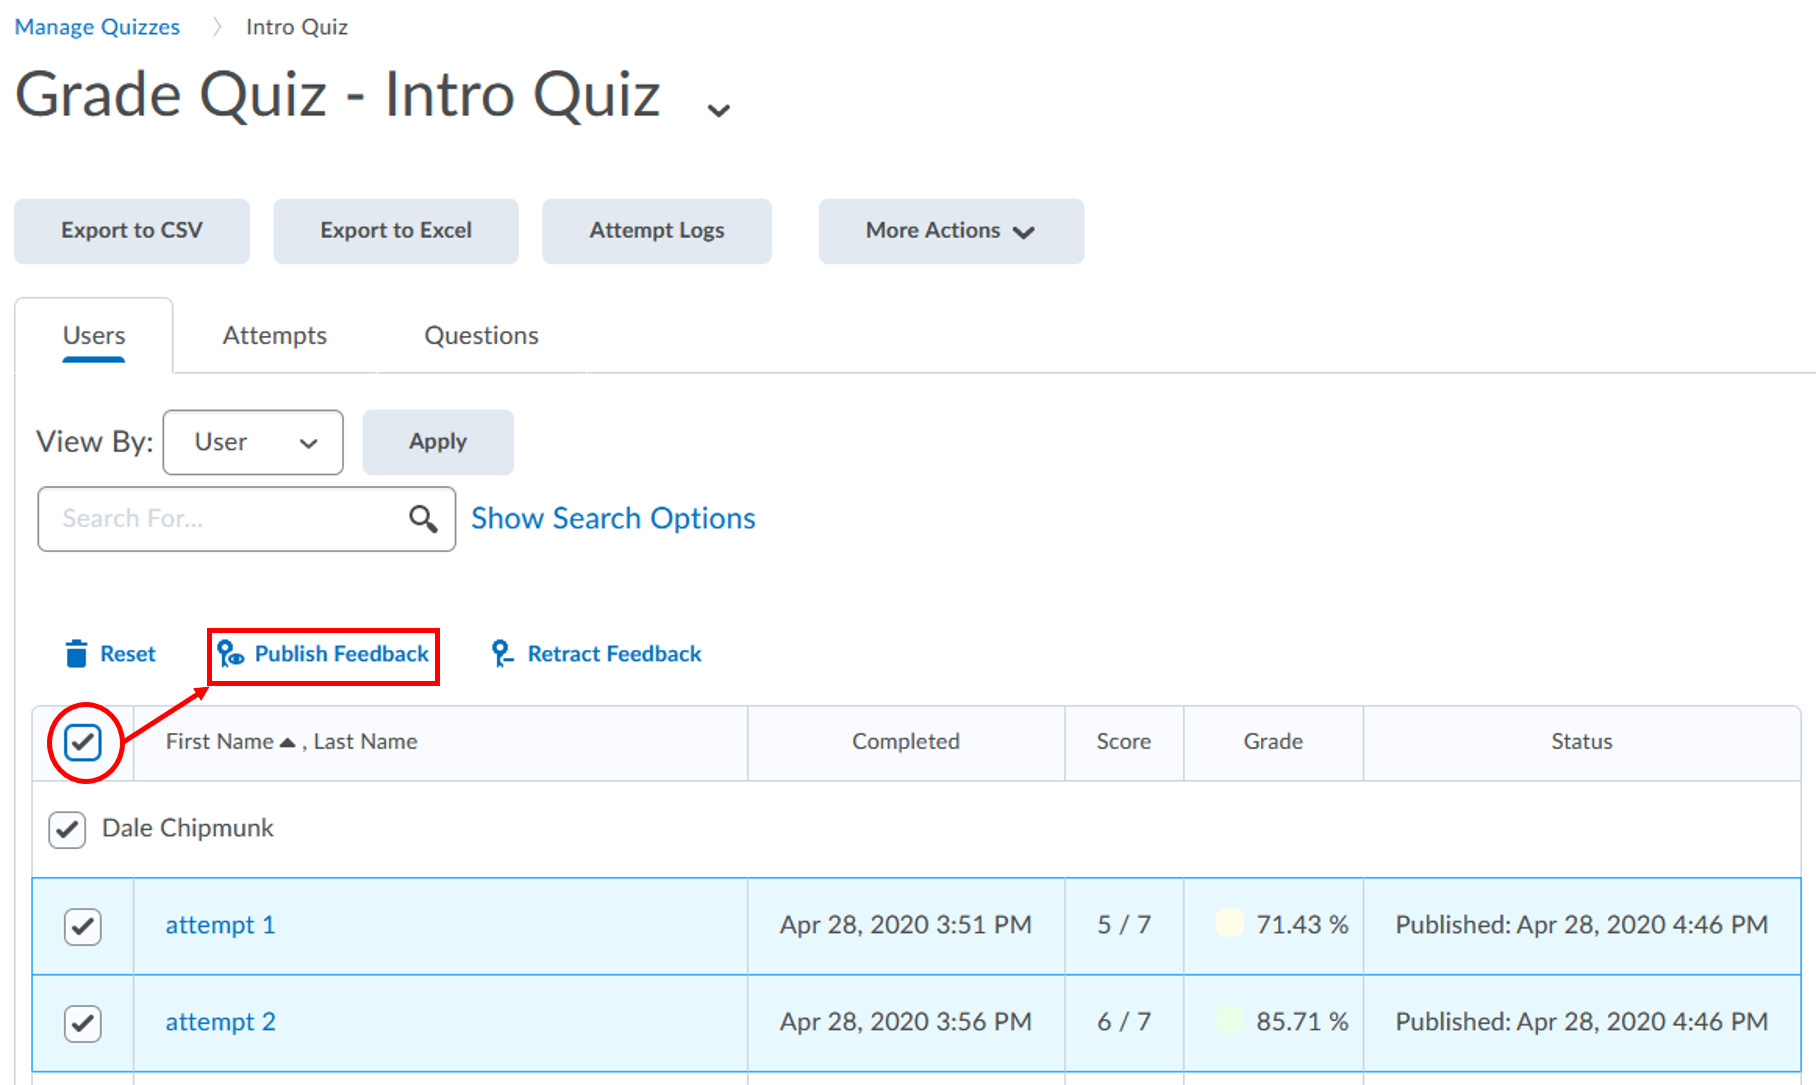
- Click Yes on the confirmation message. You will see a pop-up message “Saved successfully” on the screen
Student View of a written response question
By default, if you do not make any changes in the Quiz settings, under Submission Views tab, students will see a generic message “Your quiz has been submitted successfully.”
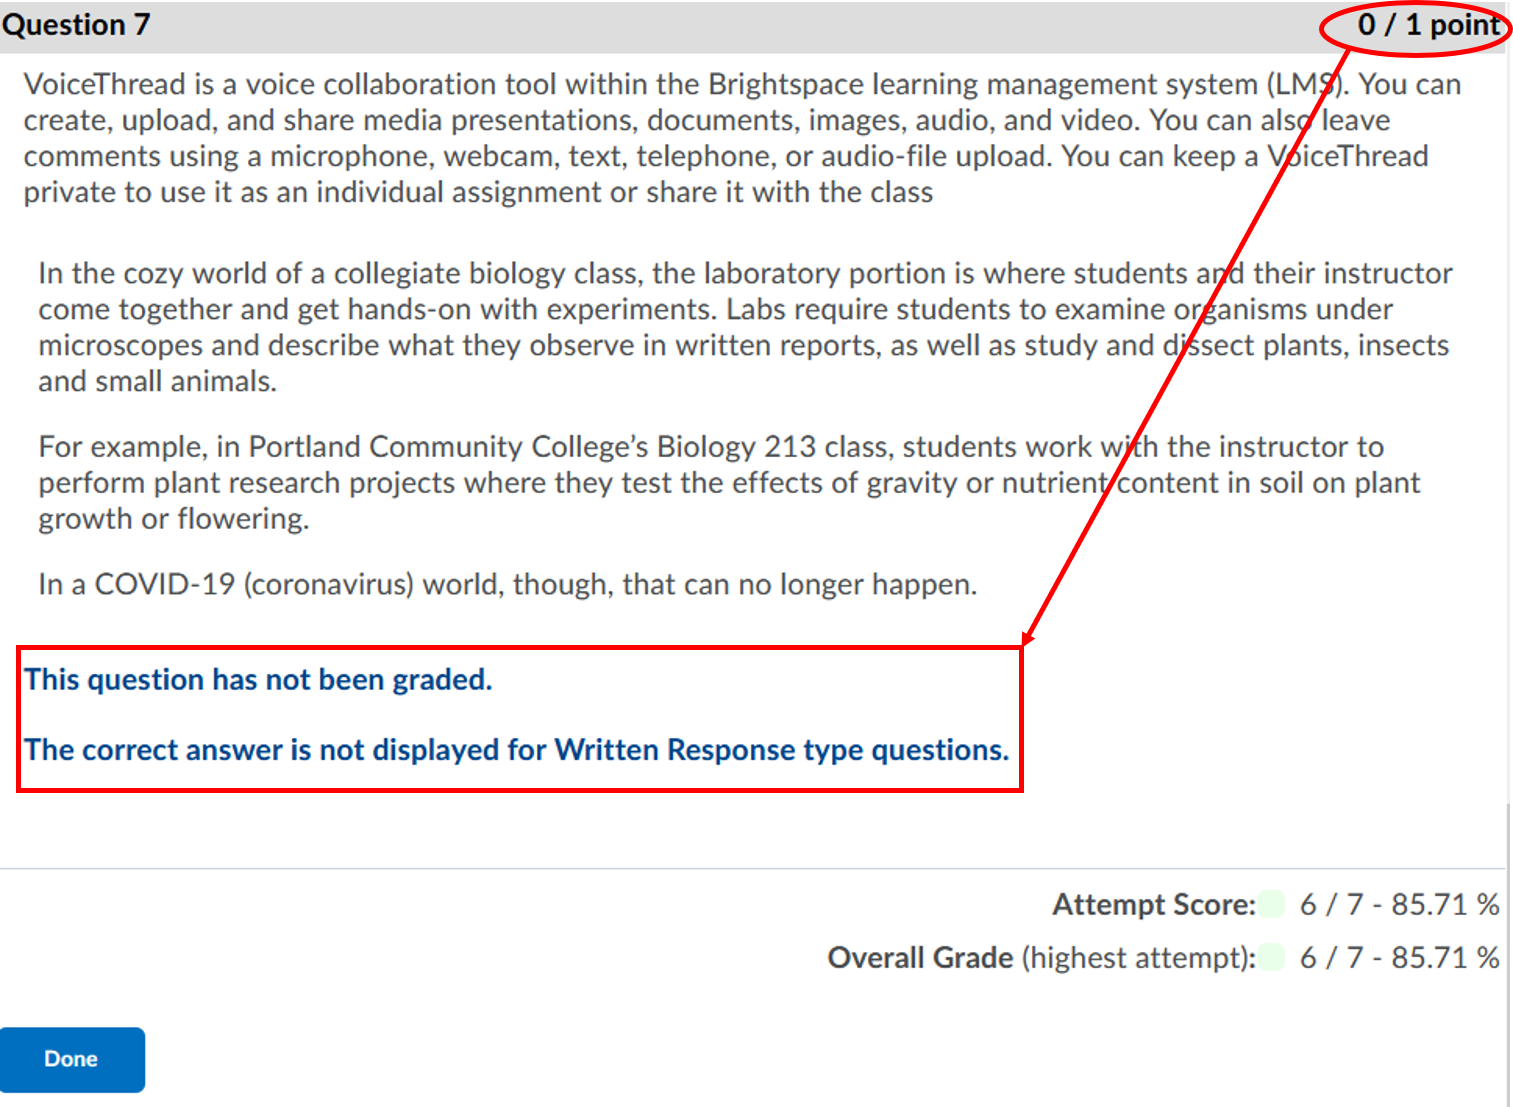
Below is what the student will see when you release the quiz result to students, but still haven’t graded the written response question. This can happen if you have a mix of questions that are automatically graded (like True/False, multiple choice, etc.) and written response questions.
- Follow the guide to release the quiz results to students. This will allow students to be able to see the question feedback that you add below each question earlier in Step 2
